Installation and setup
Step 1: Download and install
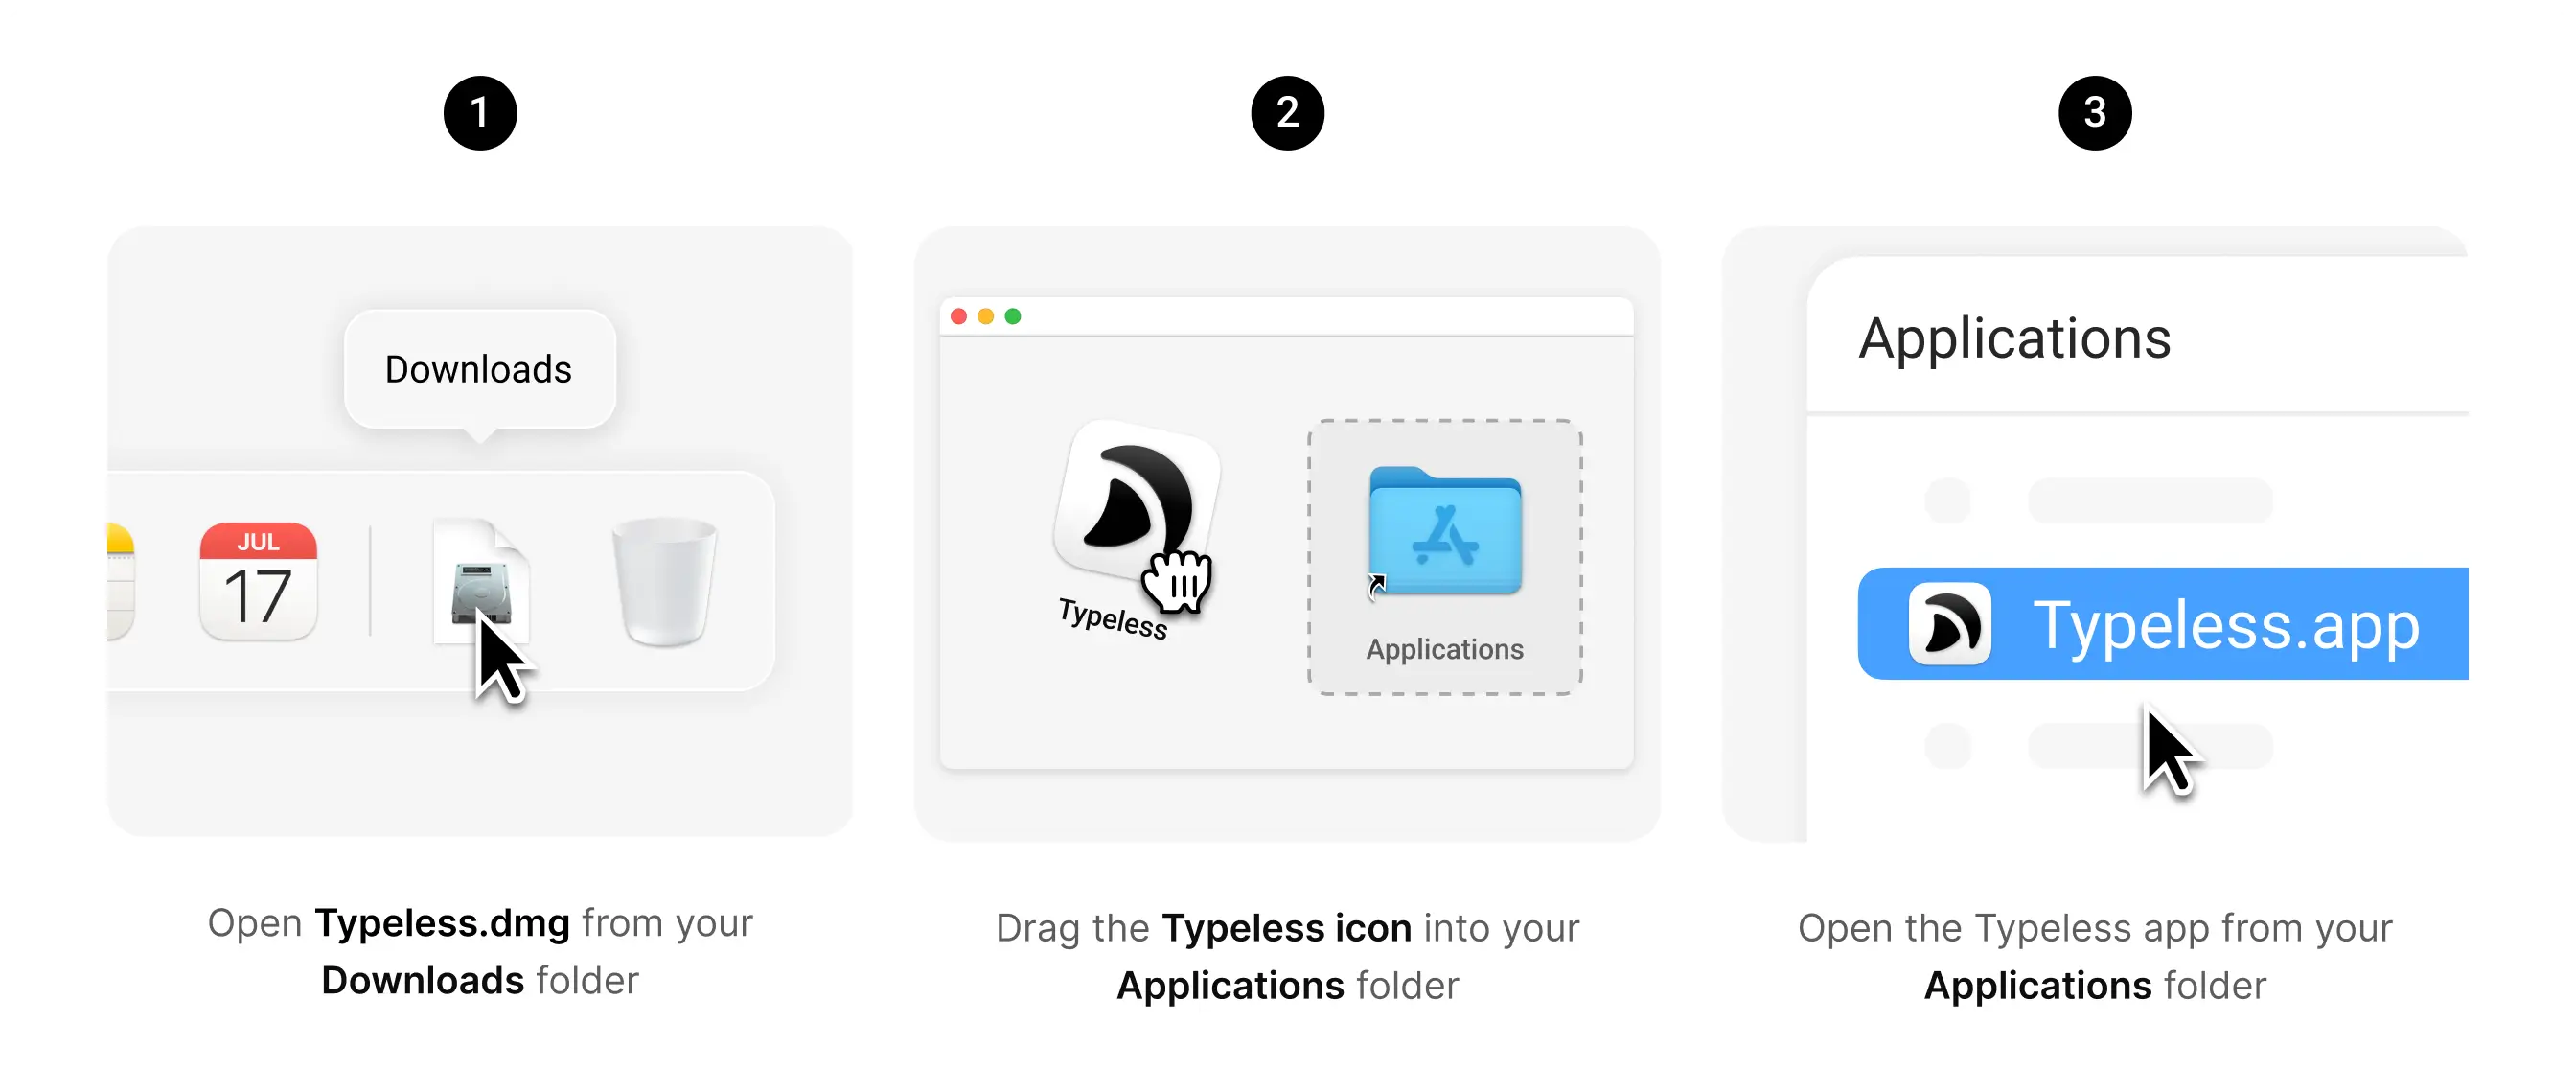
- Get the Typeless installer
Click Download for Mac.
- Open the Typeless.dmg
In your Downloads folder, double-click Typeless.dmg. You'll see a new window with the Typeless icon and the Applications folder.
- Drag to Applications
Drag the Typeless icon into your Applications folder.
Step 2: Launch Typeless
Open Typeless from Applications. You may see a warning, simply click Open.

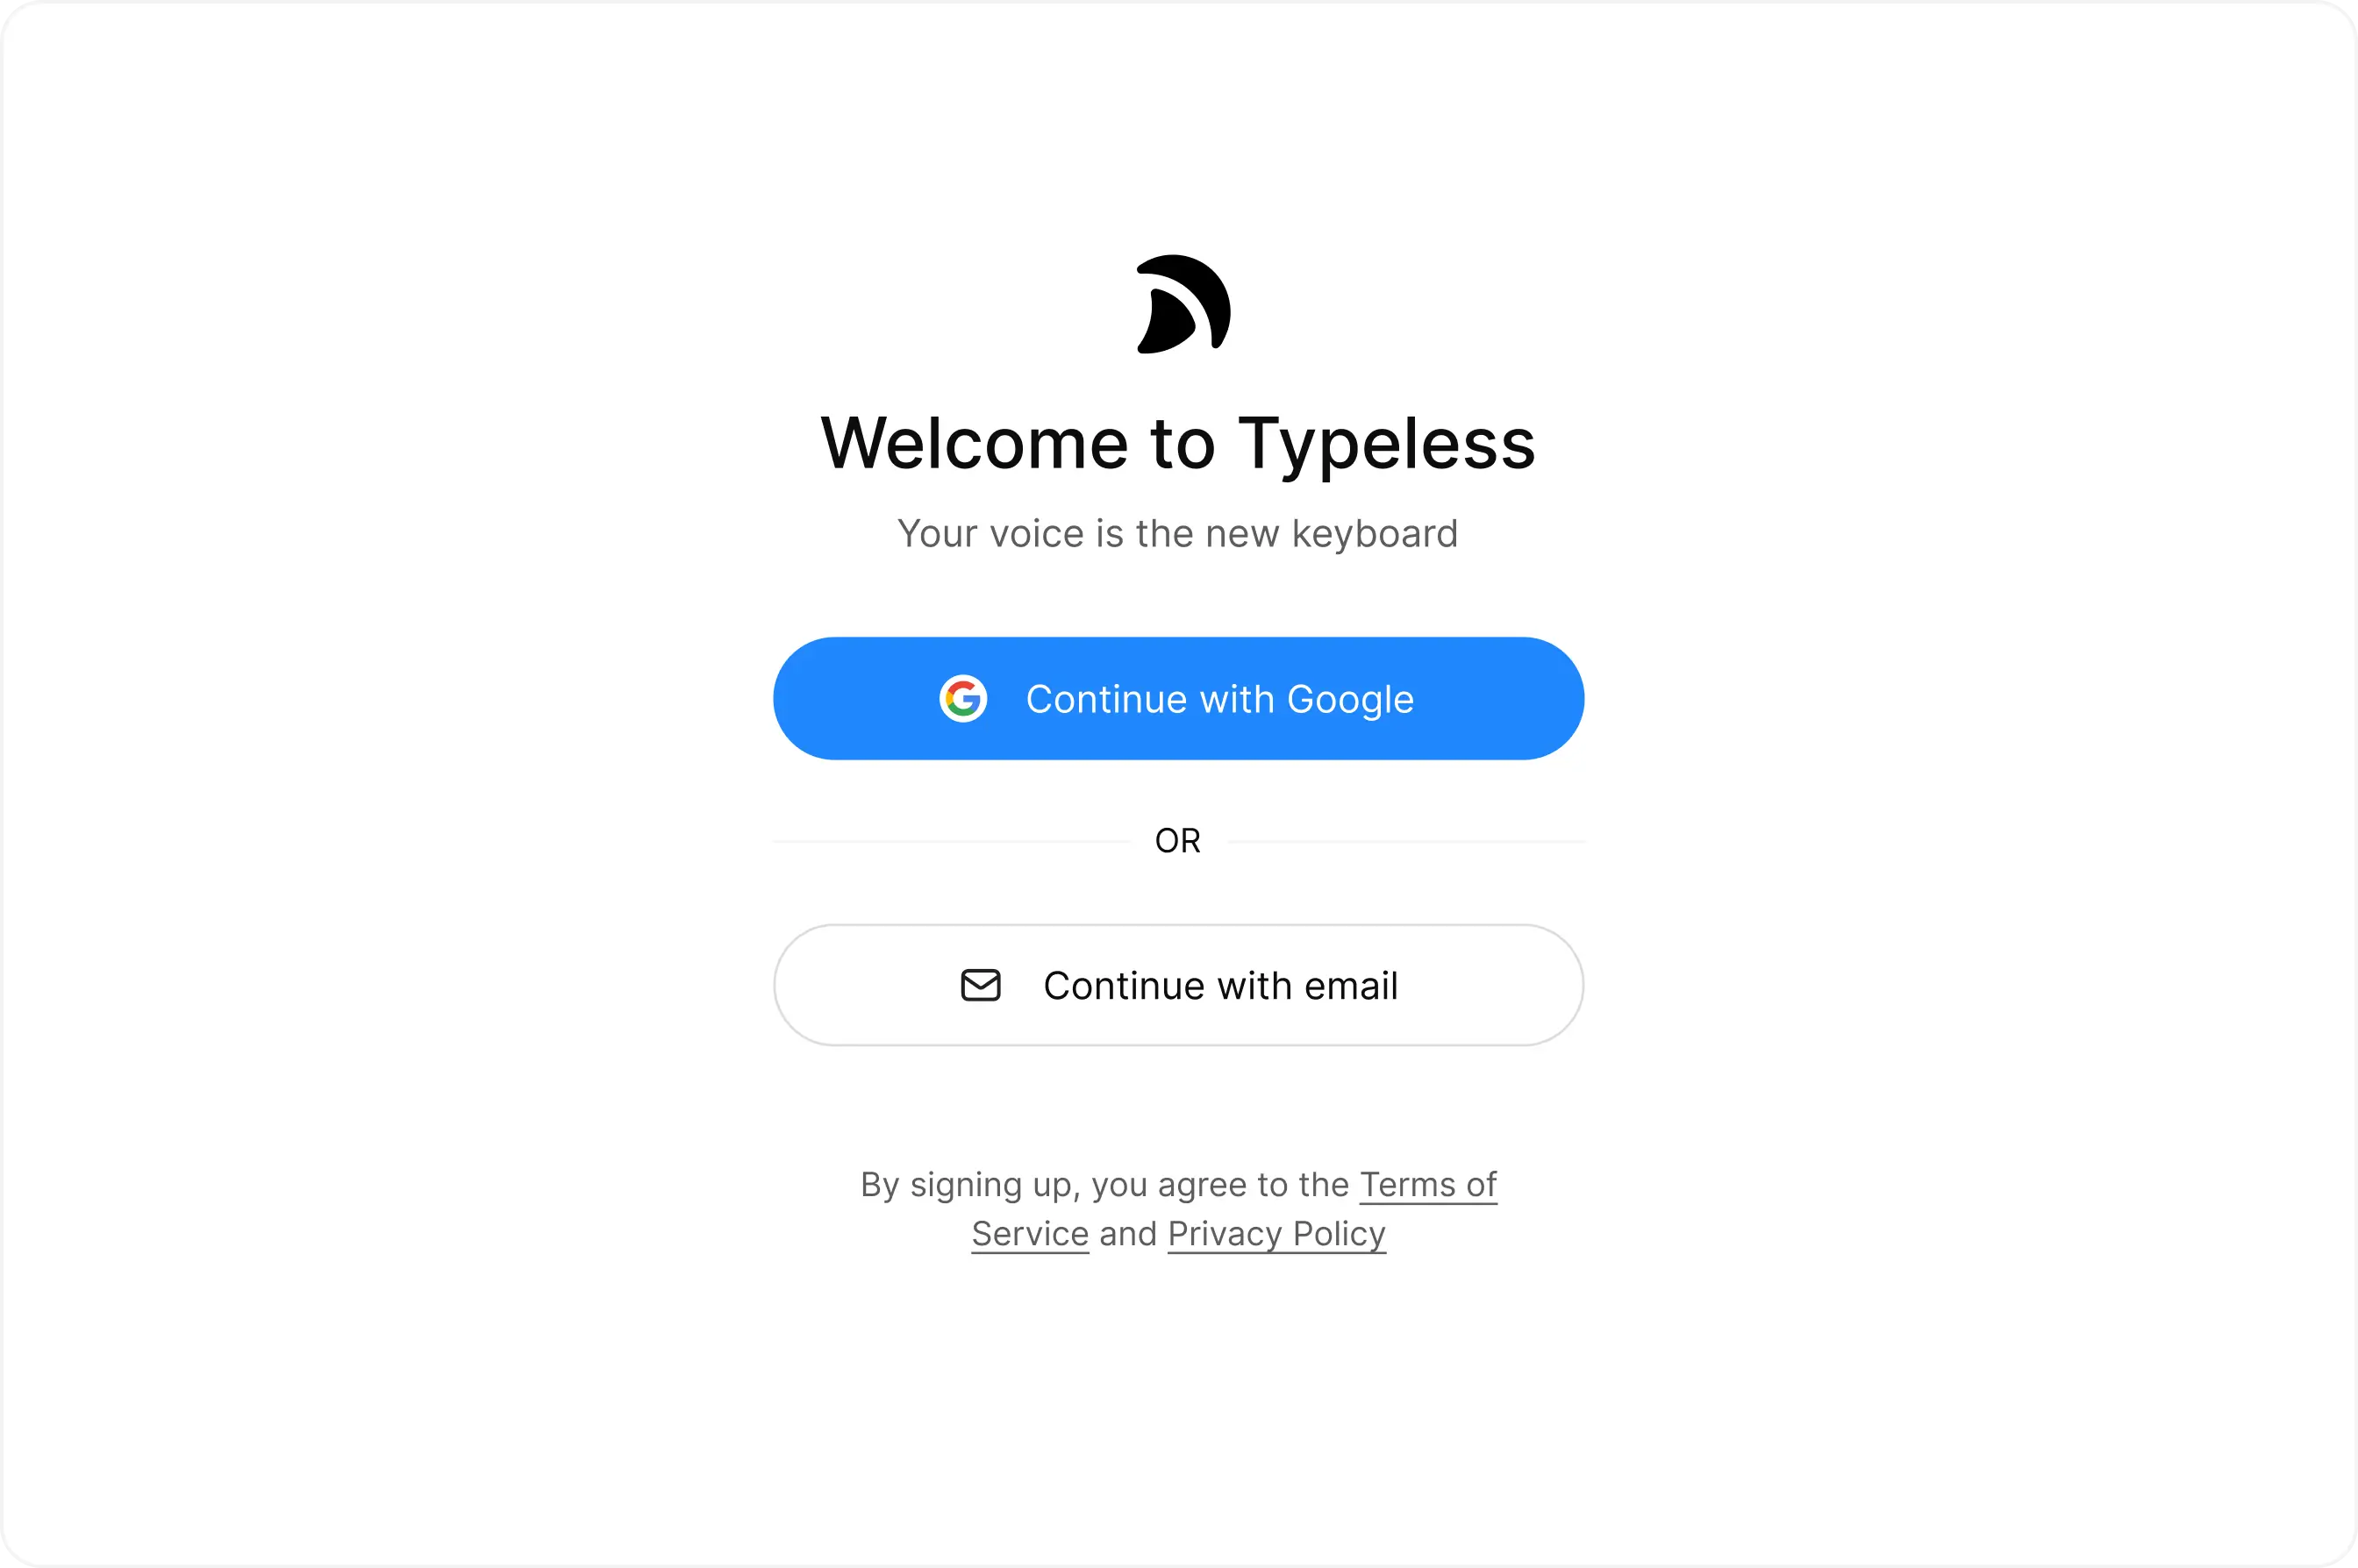
Step 3: Sign in
You can sign in to Typeless using your Google account or email address.
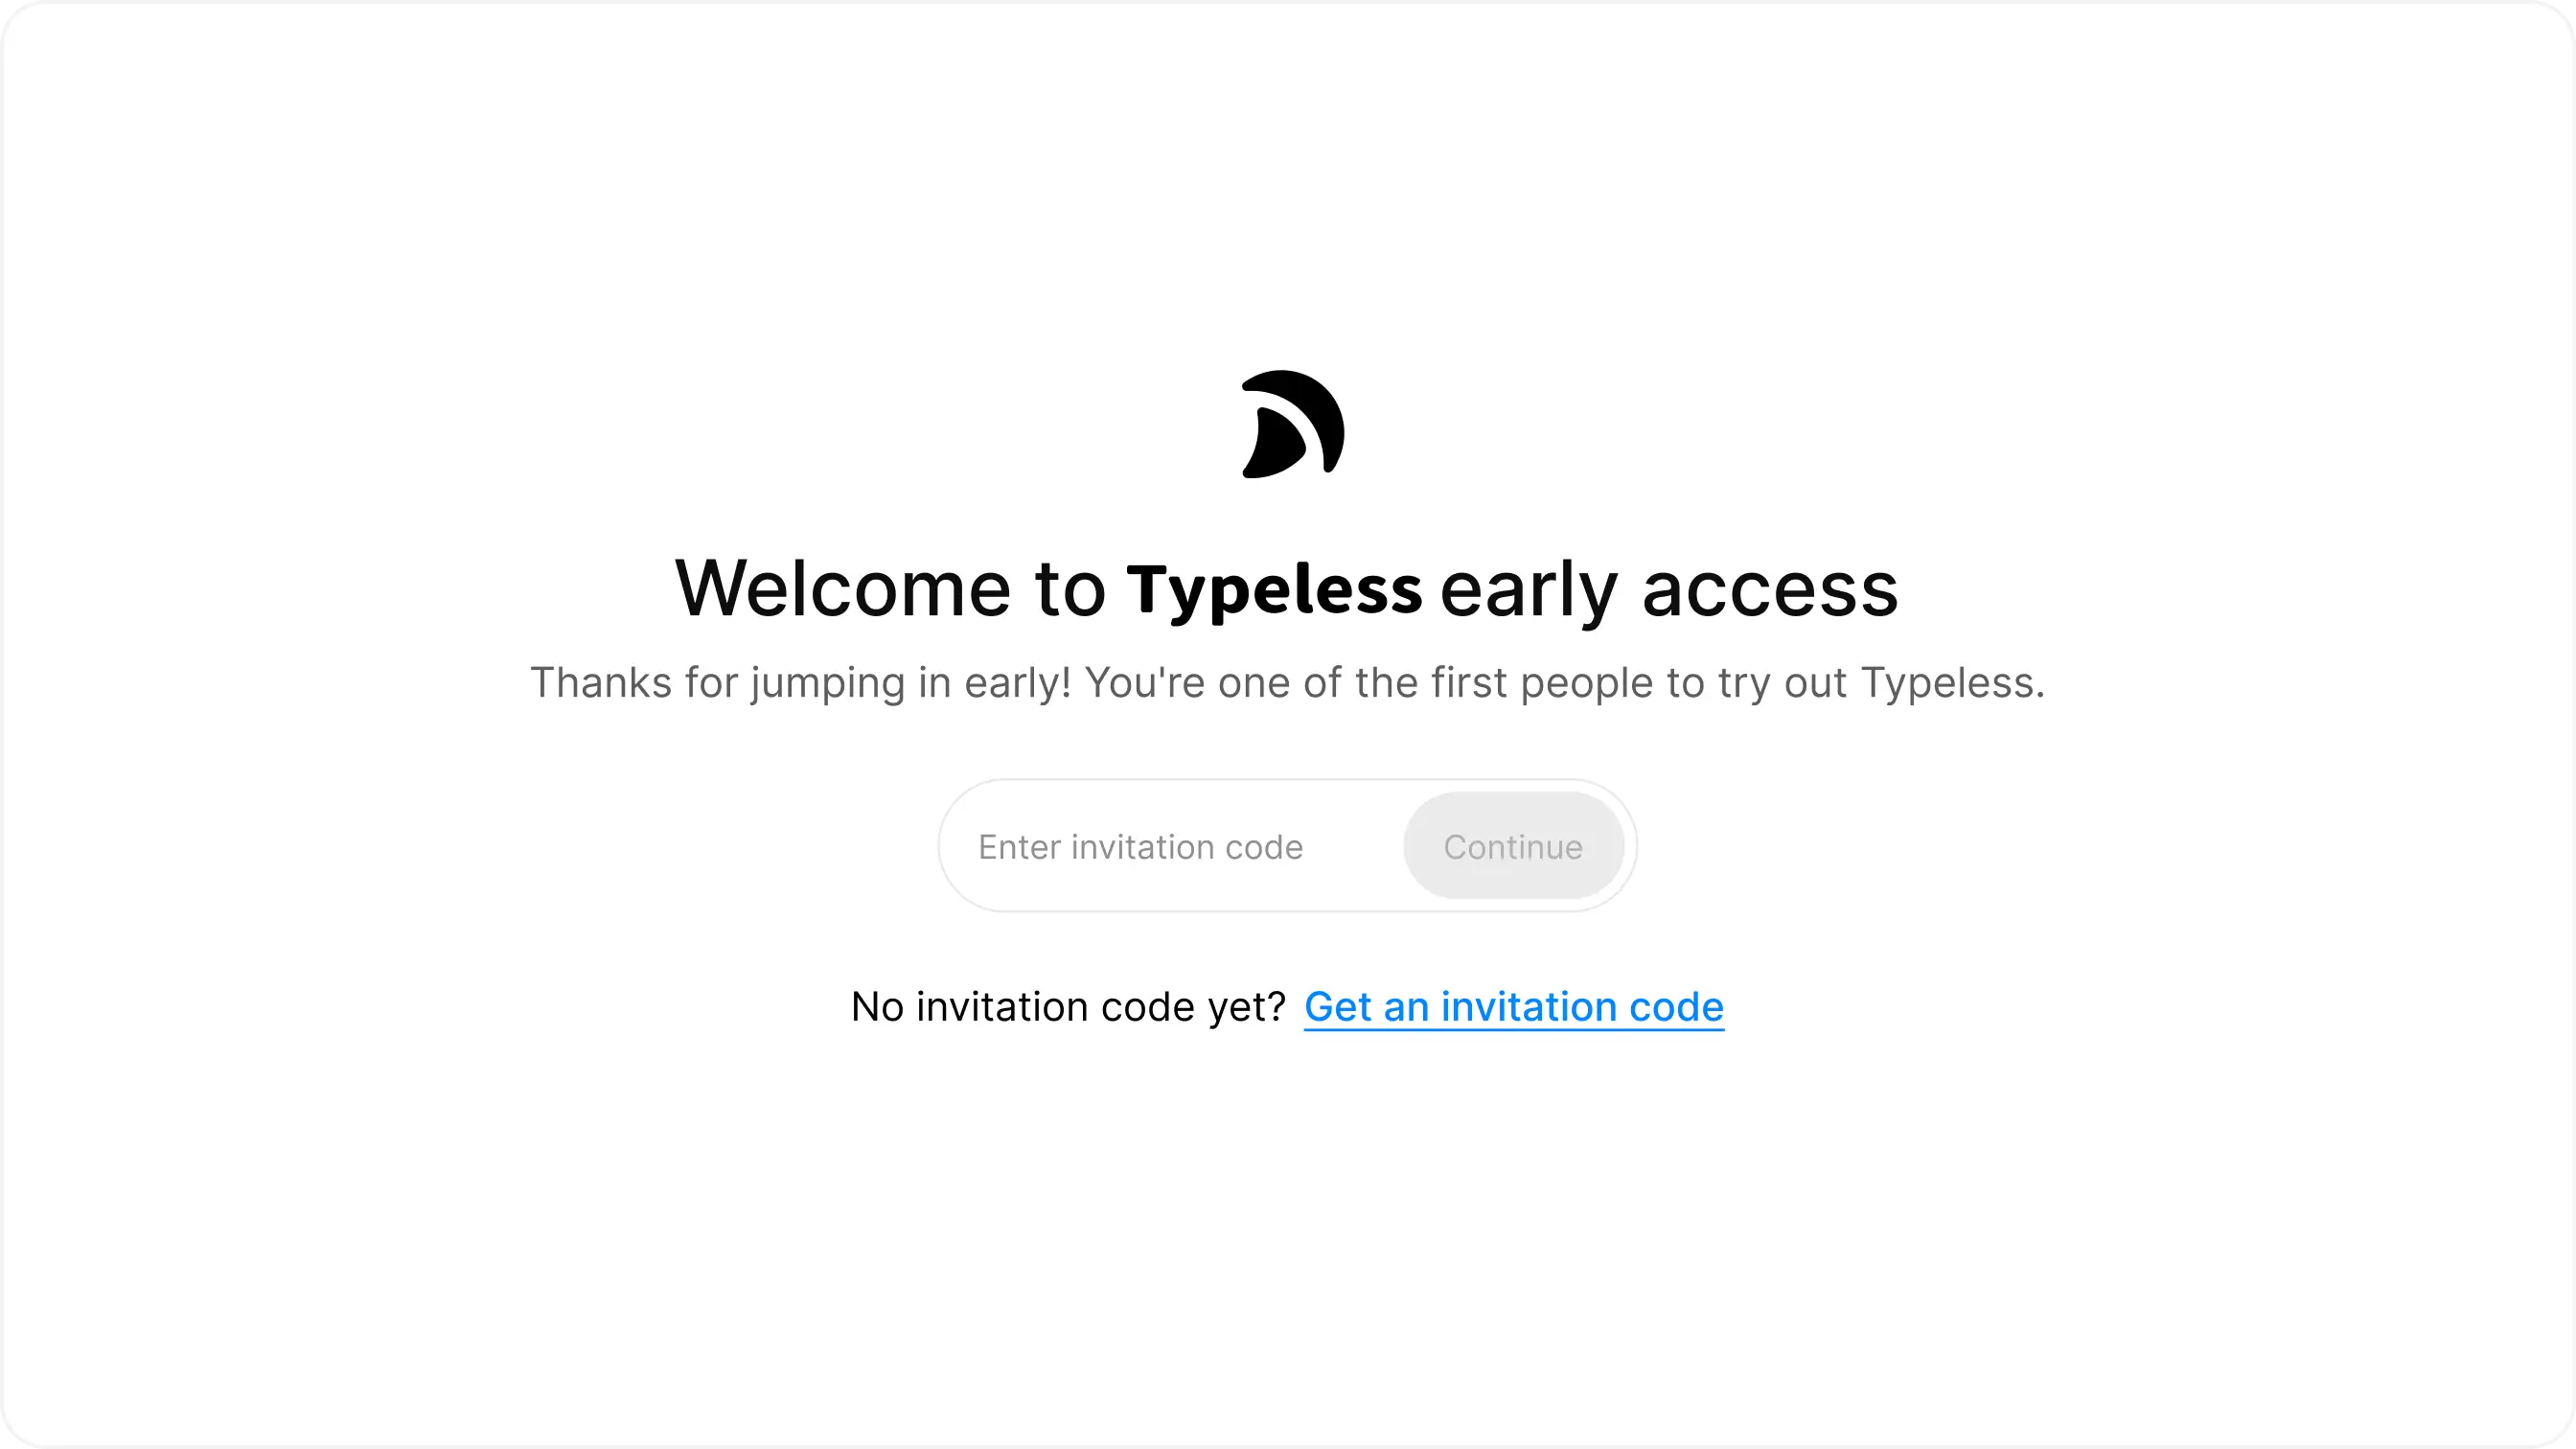
Step 4: Activating your account
We're thrilled you're here to try Typeless! Since this is a private beta, you will need your unique invitation code to activate your account.
When prompted, enter or paste your invitation code to complete your registration.
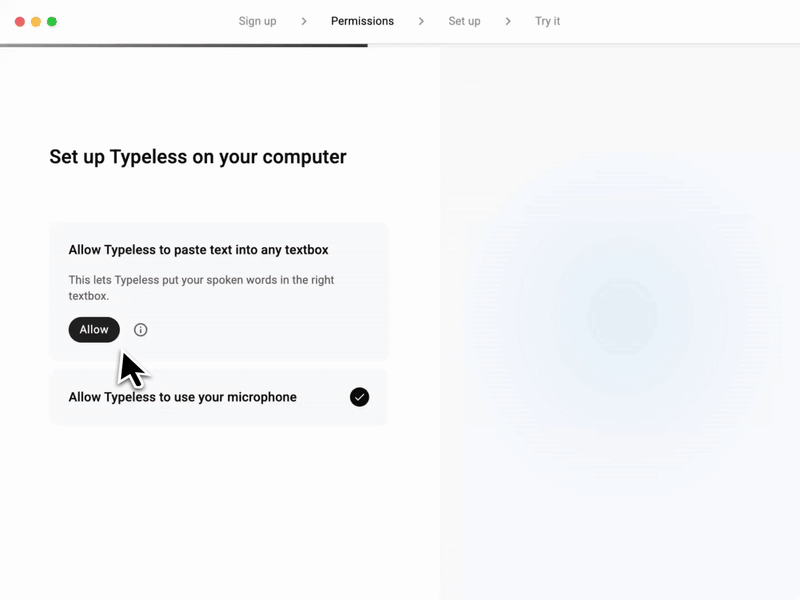
Step 5: Allow Typeless to work with your system
Typeless needs two key system permissions to work smoothly on your Mac: Accessibility access and Microphone access.
Enable accessibility so Typeless can insert spoken words
During setup, click Allow to give Typeless permission. If an Accessibility prompt appears, select Open System Settings and enable Typeless so it can insert your spoken words.
Enable microphone to dictate your voice
In the onboarding screen, you will see:
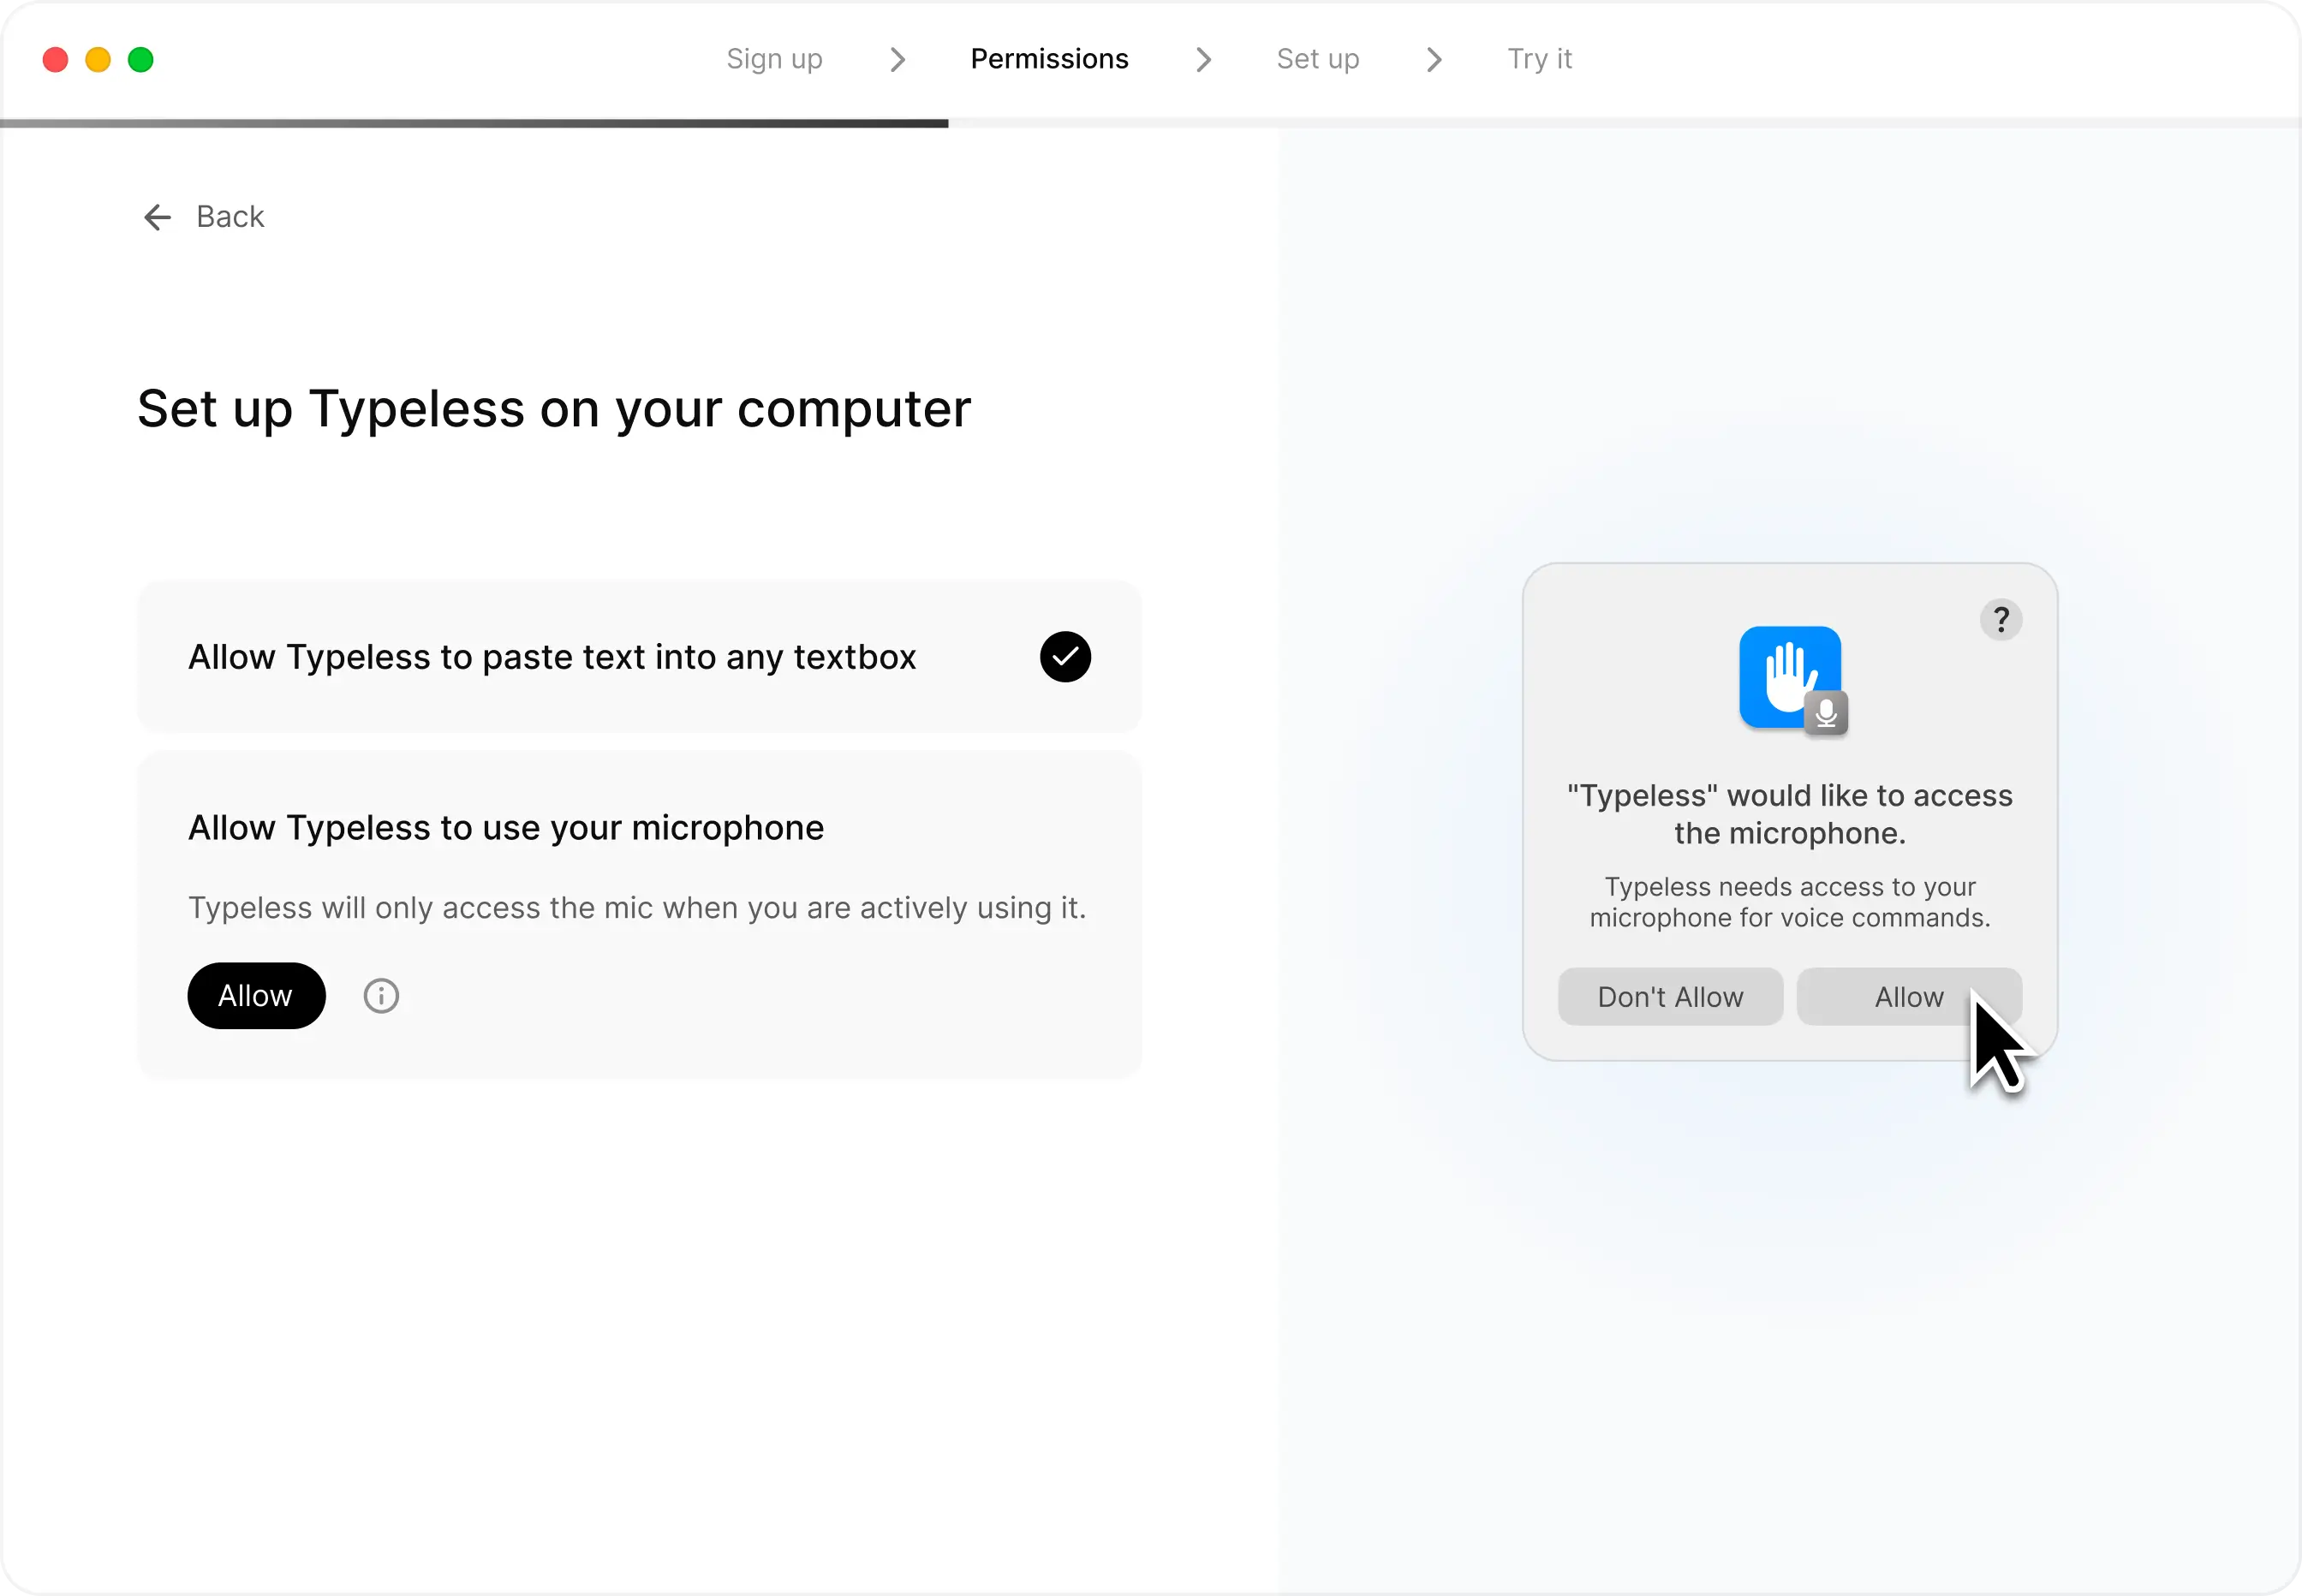
Click Allow if you see the permission prompt asking for microphone access.

Step 6: Setting up microphone and keyboard shortcut
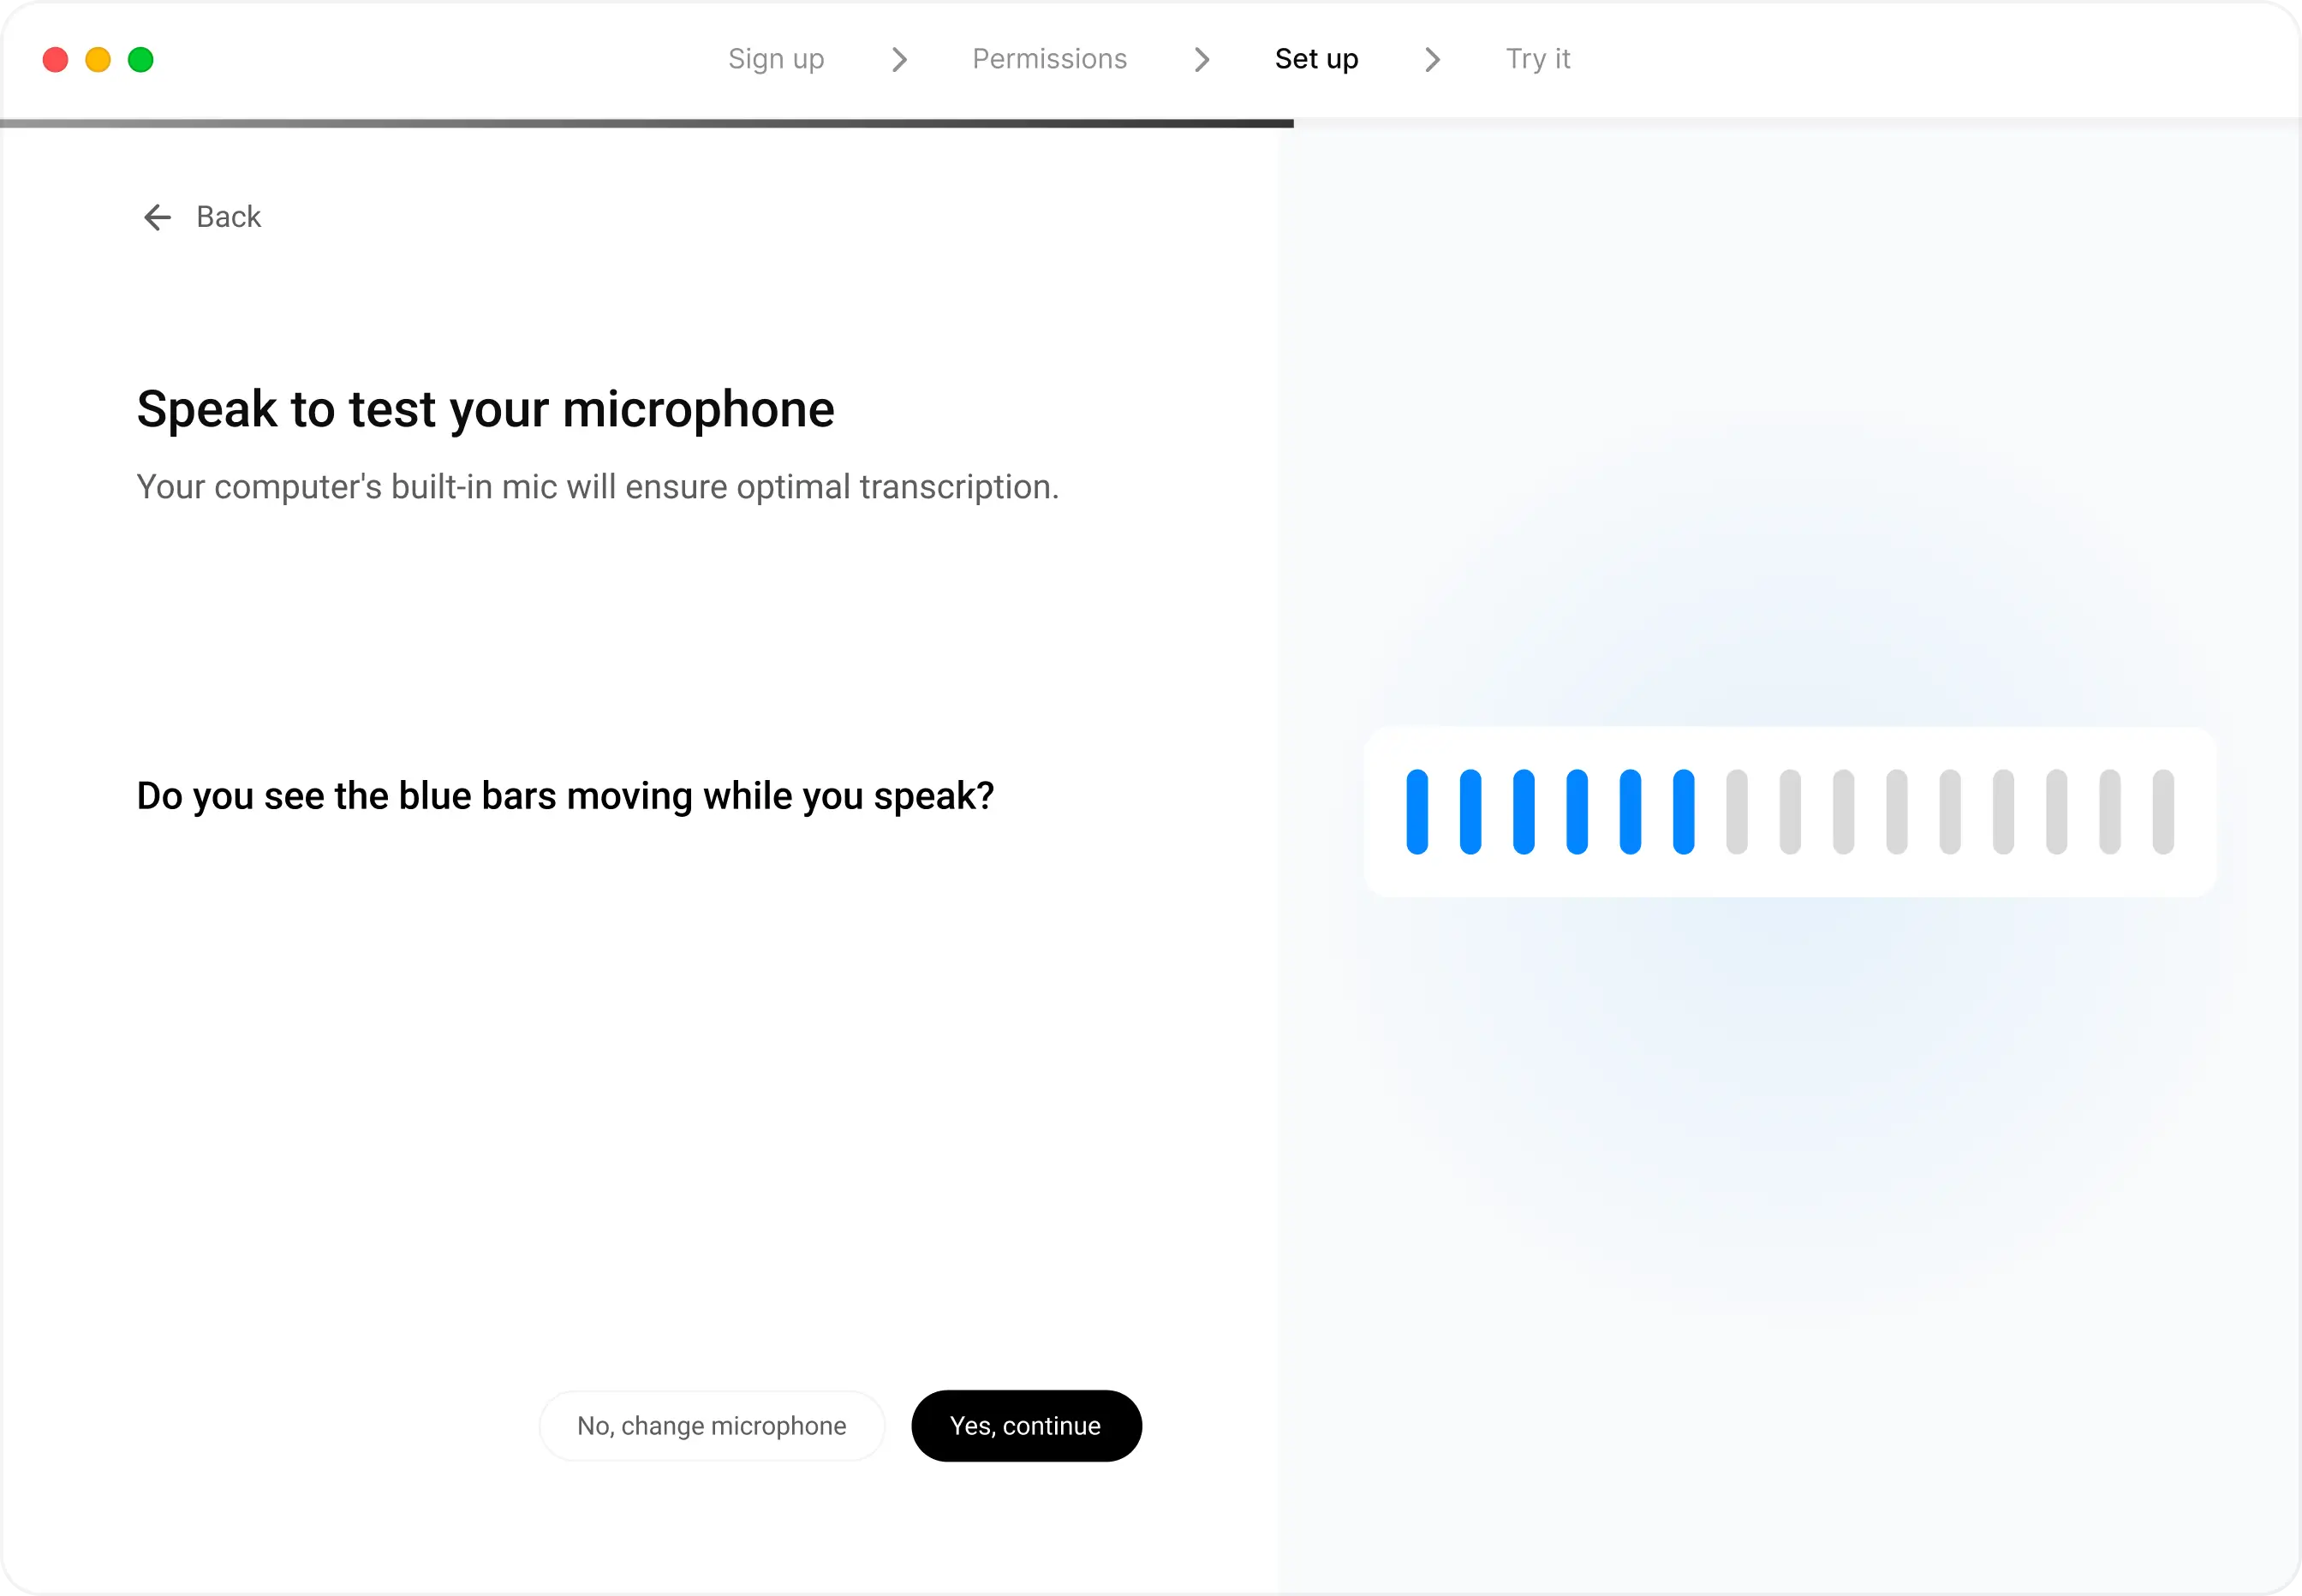
Choose your microphone
Typeless works with any microphone connected to your computer. A proper setup is key for the best dictation accuracy and speed. To check your setup, speak into your microphone.
-
If you see the blue bar moving. Your microphone is working correctly. You can click Yes, continue to complete the setup.
-
If you don't see the bar moving. Here are a couple of things to try:
- Switch your input device. If you have multiple microphones, try selecting a different one within the Typeless app.
- Check your Mac's system settings. Go to System Settings → Sound → Input. Make sure your preferred microphone is selected and that the input level responds when you speak.
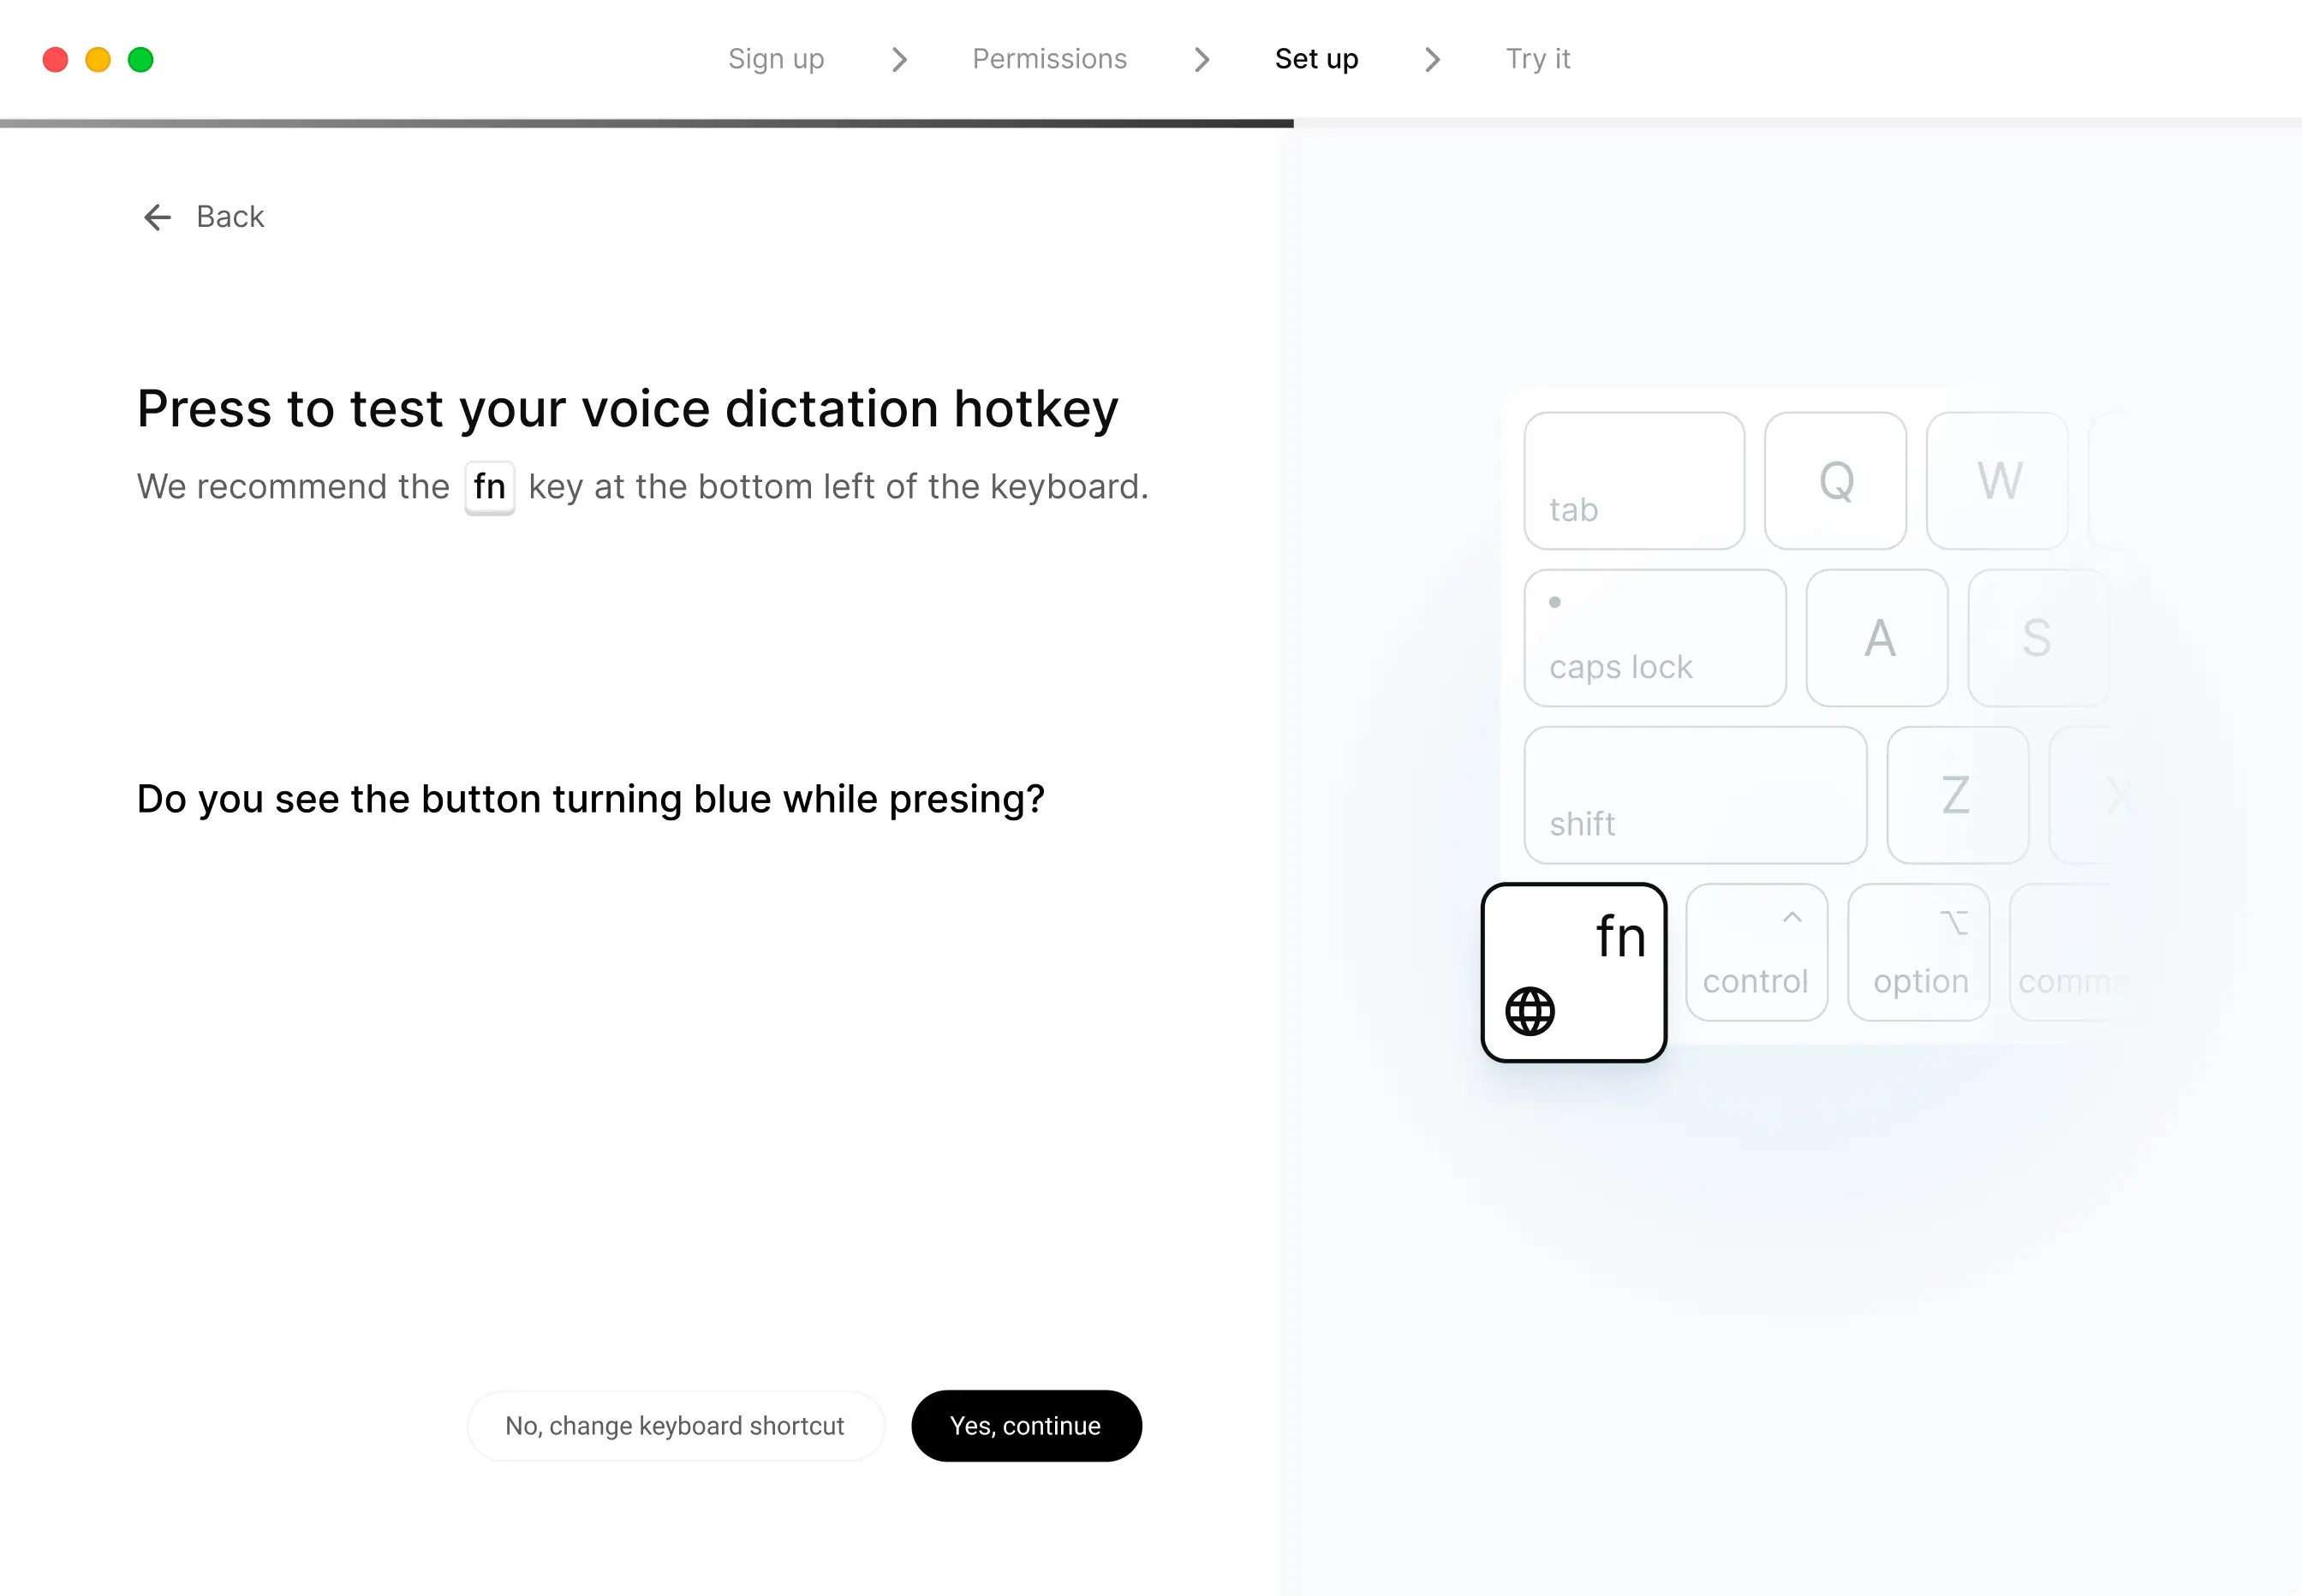
Test your voice dictation hotkey
By default, Typeless uses the Function (fn) key to start and stop dictation. This key is available on nearly all Mac keyboards and typically isn't tied to any other actions, making it a smooth and reliable choice.
If you're unsure where it is: the fn key is usually at the bottom left of your keyboard.
If the Function key isn't your favorite – or it's already doing something else – you can change your hotkey to something that works better for you.
Step 7: Experience the magic
Take a moment to experience Typeless in action and discover how its powerful features can simplify your tasks.
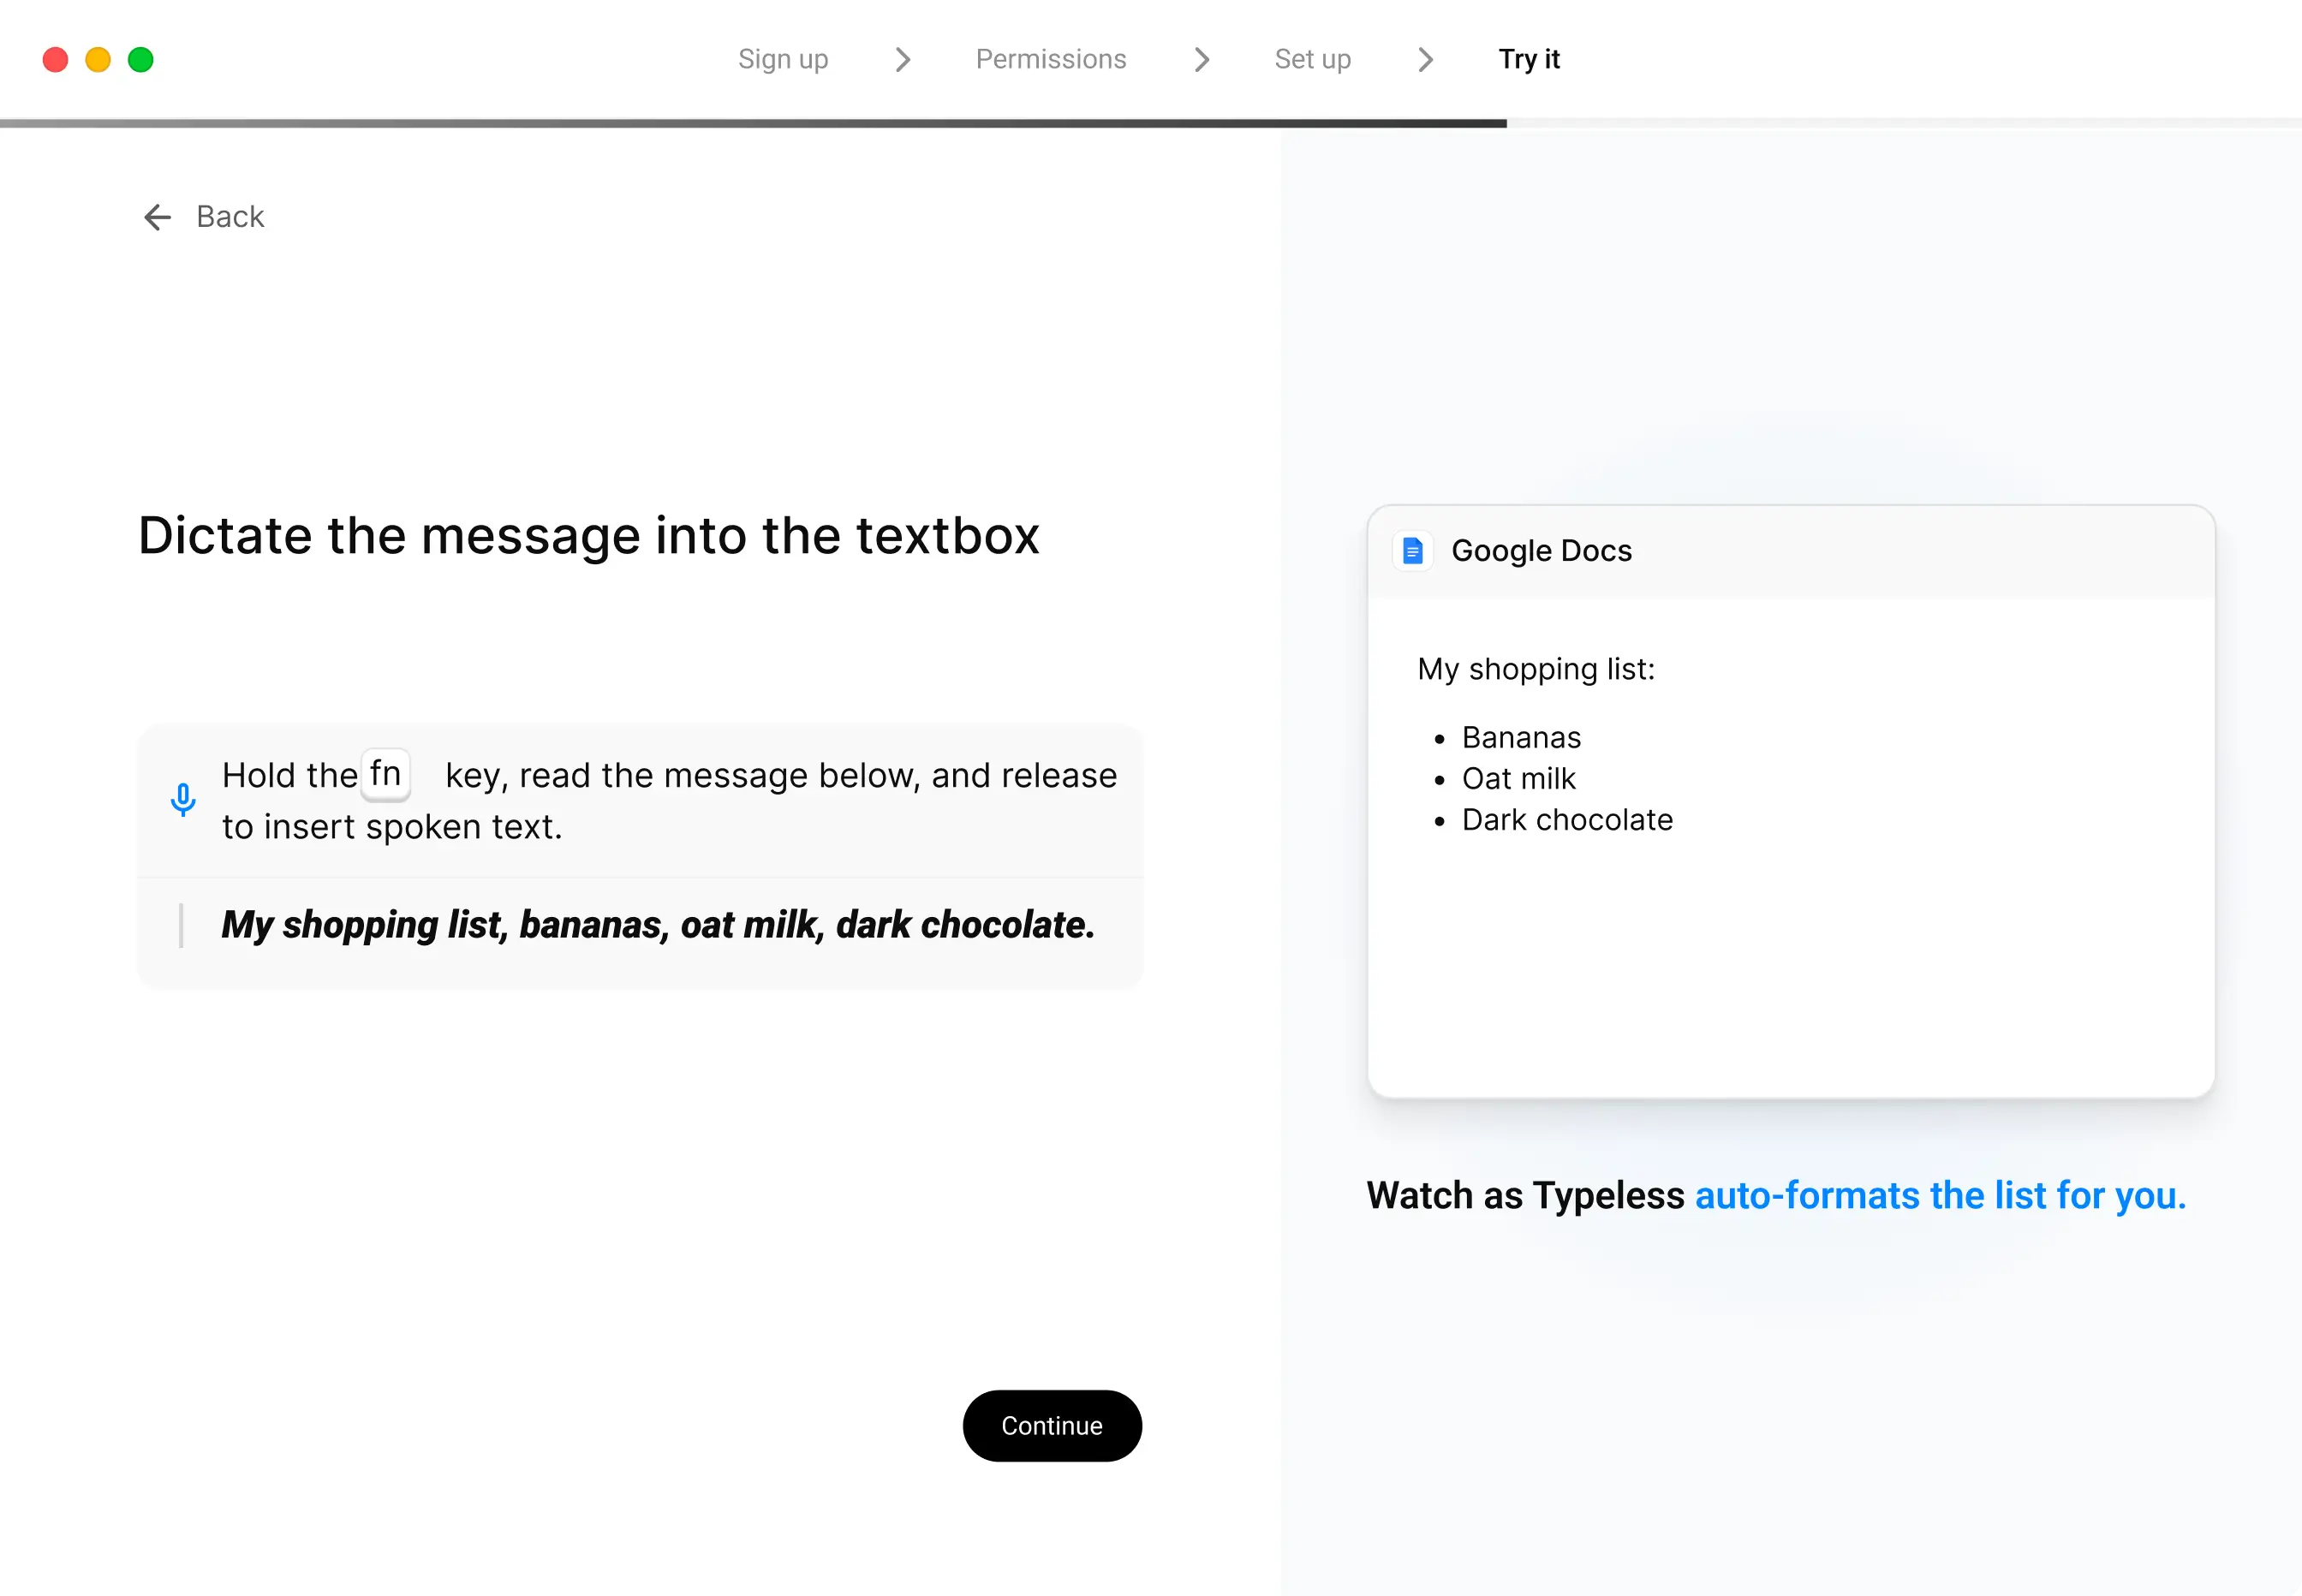
Watch as Typeless auto-formats the list for you
Hold down the fn key or your custom keyboard shortcut, and read the message below.
Watch as Typeless automatically formats your shopping list for you.
- Bananas
- Oat milk
- Dark chocolate
Watch as Typeless auto-formats the email for you
Hold down the fn key or your custom keyboard shortcut, and read the message below.
Watch as Typeless auto-formats the email for you.
Just wanted to let you know that my new phone number is (408)123-4567.
Thanks,
Jack

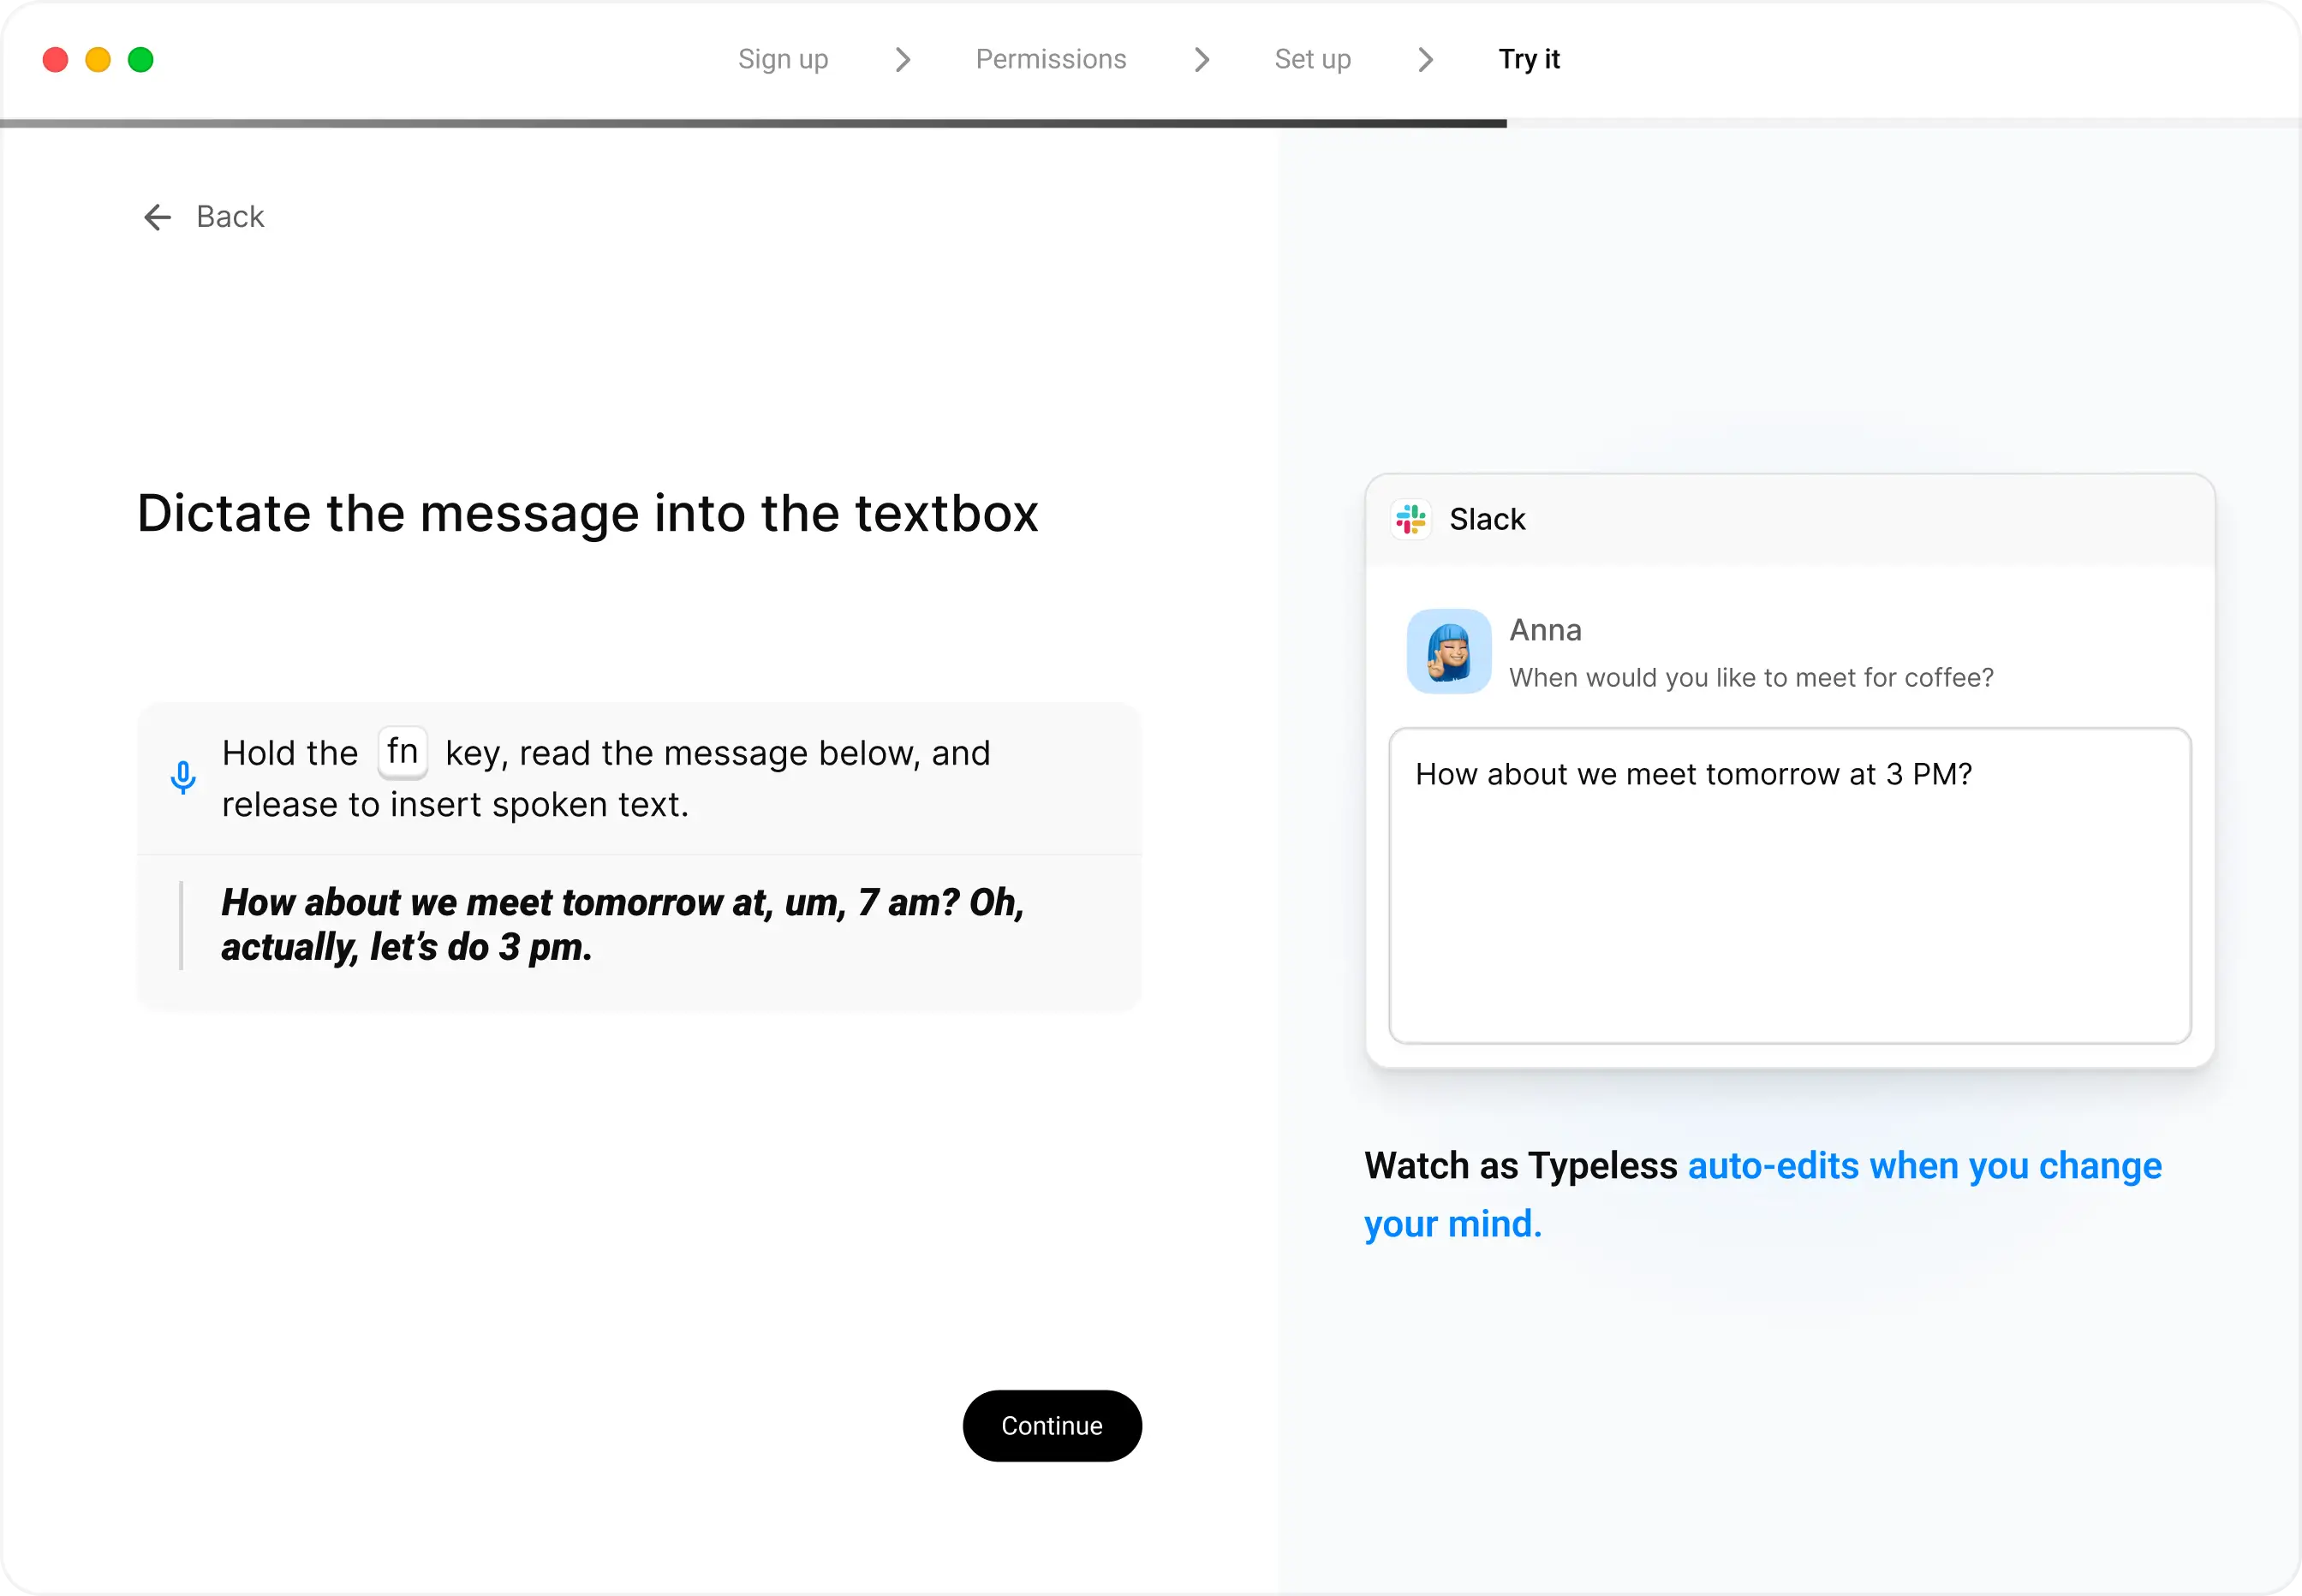
Watch as Typeless auto-edits when you change your mind
Hold down the fn key or your custom keyboard shortcut, and read the message below.
Watch as Typeless auto-edits when you change your mind.
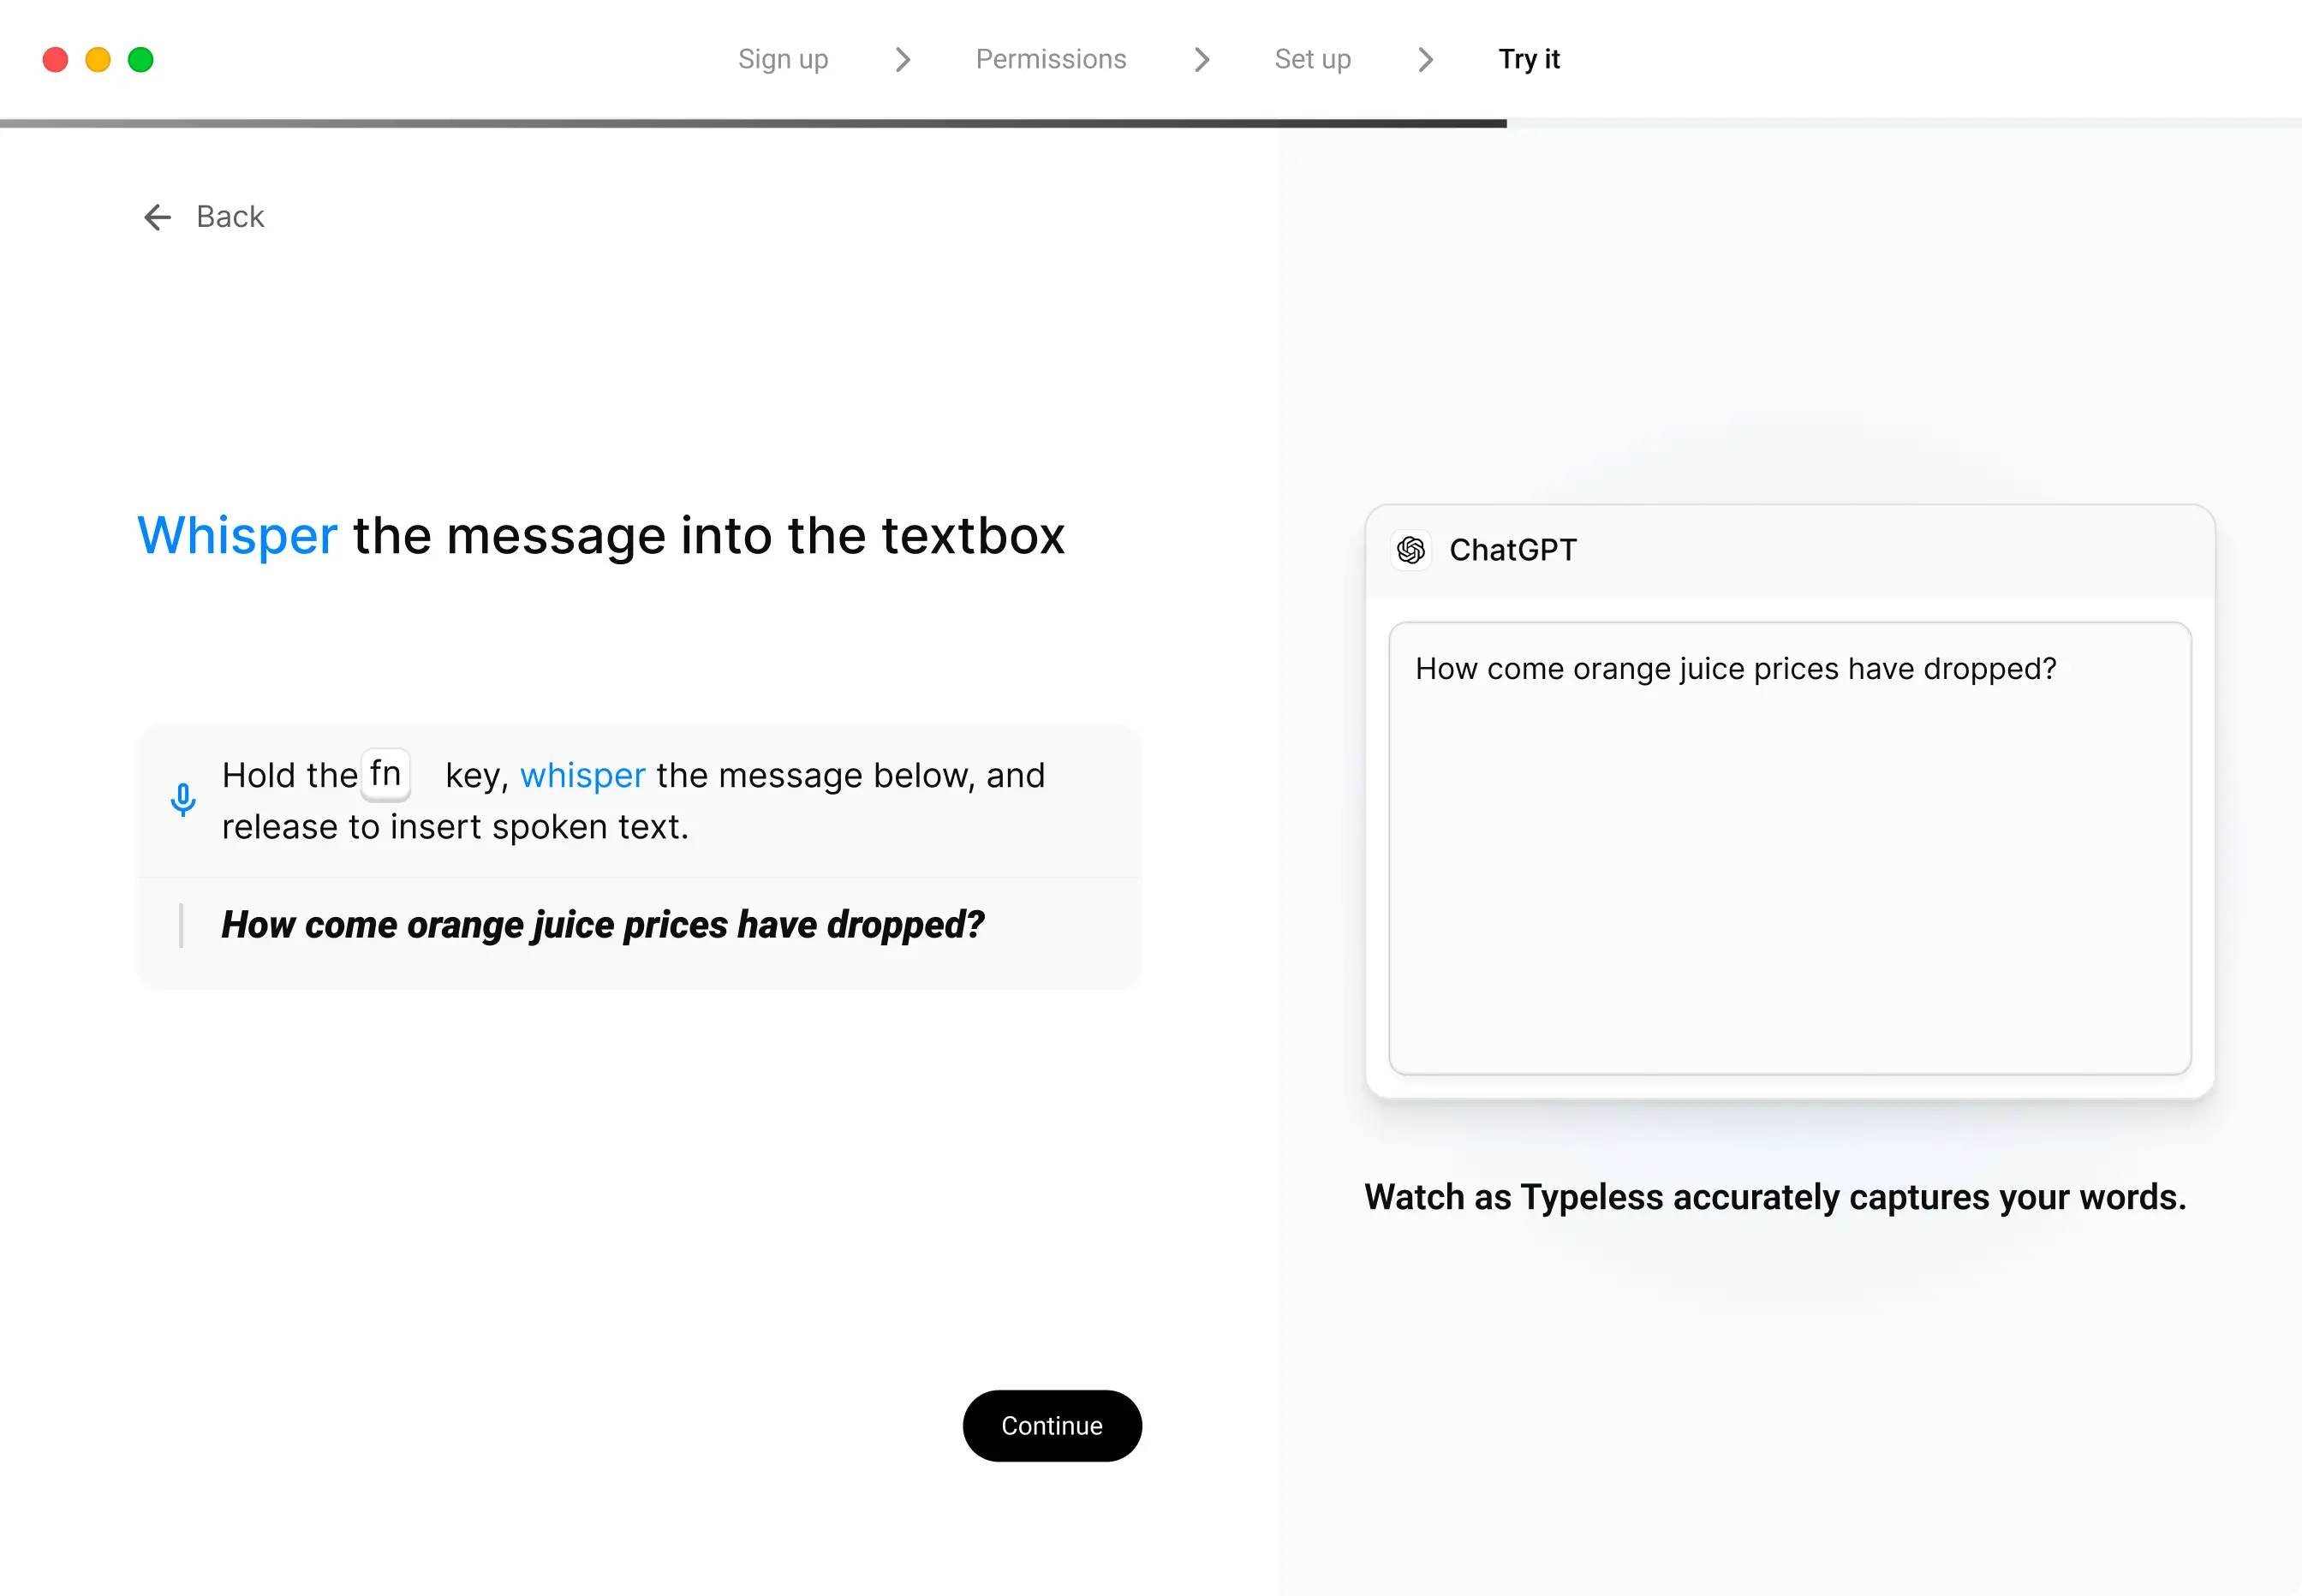
Watch as Typeless accurately captures your words
Whisper the message below and watch as Typeless accurately captures your words.
Step 8: Begin your Typeless journey
Take AI voice dictation to every textbox. Typeless works across all your apps and websites, so you can turn speech into text everywhere you write – no copying, pasting, or breaking focus.
That's it for the installation. You're ready to get started. For a deeper dive, check out our other guides like Quickstart. We're excited to have you with us!